Successful gardeners rely on compost to improve soil fertility and moisture management, nourish helpful microbes, and inoculate against destructive ones.
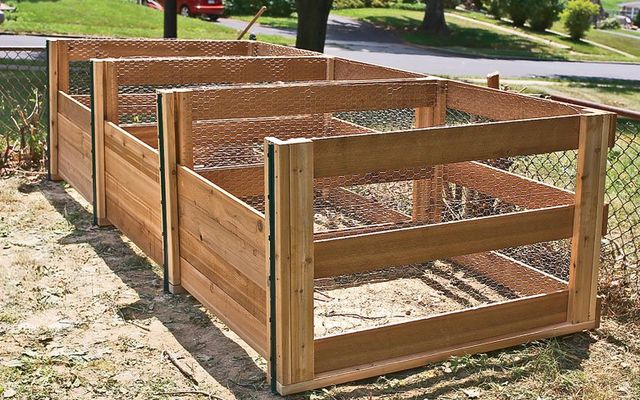
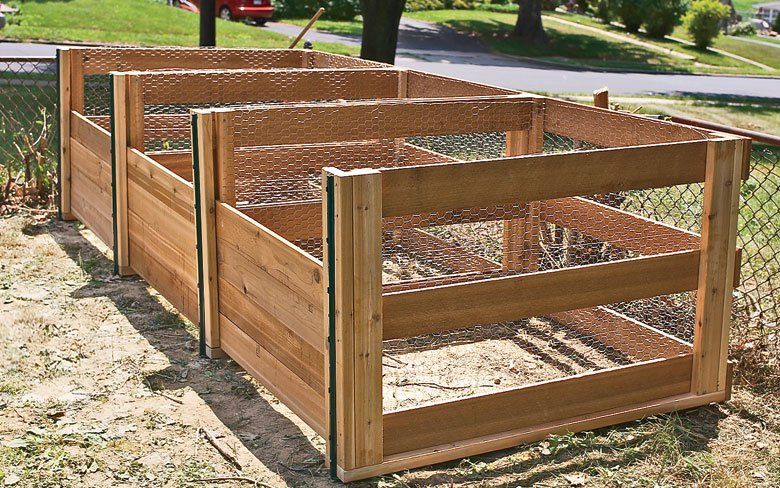
This three-bin system is a compost factory that efficiently pumps out heaps of finished black gold in weeks, rather than the months you would typically wait during a more hands-off approach. Made from rot-resistant cedar, our ultimate compost bin features removable front planks and a clean look that allows for plenty of air movement.
Best of all, you can build it in just a few hours. Here's how to make our favorite compost bin:
Tools
- 1 saw
- 1 drill
- 1 measuring tape
- 1 box of 2 inch wood screws
- 1 box of 2½ inch wood screws
- 1 mallet or sledgehammer
- 4 metal fence posts with screw holes, 4 feet long
- 1 staple gun and staples
- 1 roll of 36 feet x 3 feet wire netting like chicken wire
Wood
- 7 pieces: 1 inch x 6 inches x 12 feet
- 9 pieces: 1 inch x 6 inches x 10 feet
- 2 pieces: 1 inch x 2 inches x 10 feet
- 2 pieces: 2 inches x 6 inches x 10 feet
- 2 pieces: 2 inches by 6 inches x 12 feet
- 2 pieces: 2 inches by 4 inches by 12 feet
Wood Cuts
Removable planks: Cut four of the 1x6x12s into 3 foot 7½ inch pieces, 12 total.
Uprights (for end and middle panels): Cut the 2x4x12s into 2 foot 10½ inch pieces, 8 total.
Side slats: Cut the 1x6x10s into 4 foot 6 inch pieces, 18 total.
Front and back supports: Cut the 2x6x12s into 2 foot 10½ inch pieces, 8 total.
Bottom pieces: Cut the 2x6x10s into 4 foot 9 inch pieces, 4 total.
Plank supports: Cut the 1x2x10s into 2 foot 10½ inch pieces, 6 total.
Back slats: Use the three remaining uncut 1x6x12s.
Making the Compost Bin End Panels
1. On a flat surface, place two side slats on top of two uprights. To avoid splitting the wood, drill guide holes first. Attach.
2. Attach a third side slat, spaced evenly, to make one side panel.
3. Position the front and back supports as shown, placing the assembly on a hard surface (we used one of the planks).
4. Attach the supports, screwing into the side slats and also into uprights.
5. Flipping the panels upside down, attach bottom pieces as shown using the 2½ inch screws.
6. Repeats steps 1 through 5 to build the other end panel.
7. To make grooves for removable planks, lay panels flat. Allow one plank’s thickness (plus a little), and attach the plank supports to the side slots, leaving a plank in place as a guide.
Making the Compost Bin Middle Panels
Build these panels as you did the end panels, with a few exceptions.
1. Repeat End Panel steps 1 and 2 above.
2. Flip the panels and fasten three more side slats on the other side of both middle panels.
3. The front and back supports must be centered perpendicular to the uprights.
4. Attach the bottom pieces, being careful to screw into the side slats. Use the 2½ inch screws.
5. As with the side panels, create grooves for planks by attaching plank supports to the uprights.
6. Do this on both faces of the two middle panels, as shown.
Putting the Compost Bin Together
1. Balance the panels on their front supports. Attach the three 12 foot back slats to both end panel back supports.
2. Measure 49 inches from each end to mark where the middle panels will go. Attach the middle panels with screws, centering marks on back supports.
3. Place a bin with bottom pieces on soil and slide four removable planks into each bin to evenly space front supports.
4. Remove the planks and pound in metal fence posts.
5. Attach the posts.
6. Staple wire netting to the insides of each bin.
7. Replace the removable planks and you’re done!
How to Work the Compost Bin System
Fill the first compost bin with compostables like fruit and veggie scraps, wood shavings, dry leaves, or old newspapers. When it's full, turn the contents into the second compost bin every few days (the more often you turn it, the faster the decomposition will occur).
Begin filling the third compost bin with fresh materials. When the third bin is full, the second bin is "finished," and the first bin is empty, allowing you to start the process over.
